HALF CROSS

TENT STITCH METHOD 3
Half Cross is the final of the 3 Tent Stitch methods. Like Continental, Half cross is worked in horizontal rows but the back looks very different with small vertical stitches instead of dense rows of diagonal stitches. As a result, the main advantage of using Half Cross is that it uses less yarn and is therefore more economical.
It would work well for a framed piece of work. However, because the finished product is less robust. we wouldn’t recommend it for a project where the item will need to support some wear and tear such as a cushion cover.

STEP BY STEP
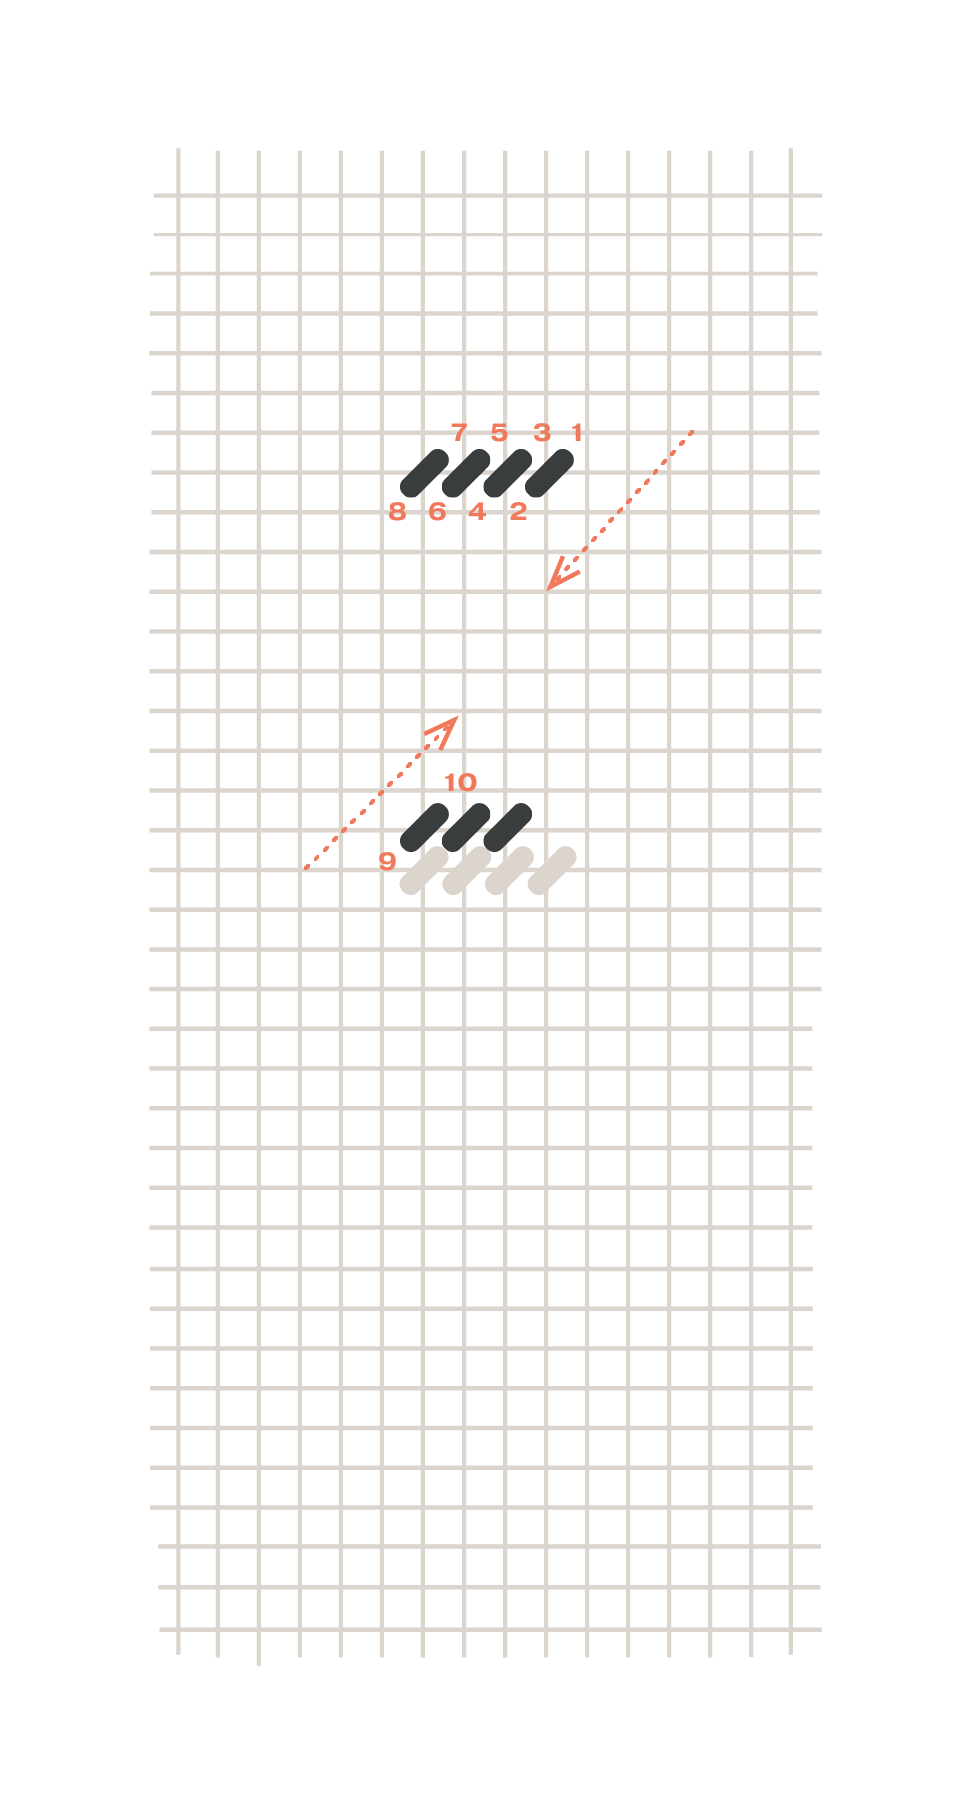
- Begin in the upper right area of the section you are working on and work from right to left, start your first stitch by coming up in the top right (1) and crossing diagonally over one intersection and going down into the canvas one row down and one column along to the left (2).
- For your second stitch come up in the hole immediately above (3) creating a small vertical stitch on the back and cross diagonally to go down into the canvas (4).
- For your second row return in the other direction from left to right. In this direction, the order of the stitch is reversed and so come up from the back of the canvas in the bottom left (9) and cross diagonally over one intersection, going down into the canvas one row up and one column along to the right.
OTHER TENT STITCH TECHNIQUES
-

CONTINENTAL
find out moreContinental is worked in horizontal rows and is reasonably hard wearing. It is best used for smaller areas as it can pull the canvas out of shape when used over large sections due to the multiple rows of right slanting stitches.
-

BASKETWEAVE
find out moreBasketweave is the most hard wearing version of Tent Stitch and should always be used for large areas as it’s less likely to warp the canvas. It is worked in diagonal rows either from the top right hand corner down or bottom left hand corner up.
YOU MIGHT ALSO LIKE...
-

SCOTCH
find out more -

BRICK STITCH
find out more -

BYZANTINE
find out more
NEW IN
-
QUIET SHORES TAPESTRY NEEDLEPOINT KIT
Regular price £75.00 GBPRegular priceUnit price / per -
EVENING LIGHT TAPESTRY NEEDLEPOINT KIT
Regular price £75.00 GBPRegular priceUnit price / per -
MAGNOLIA BLOOMS TAPESTRY NEEDLEPOINT KIT
Regular price £75.00 GBPRegular priceUnit price / per


