CONTINENTAL

TENT STITCH METHOD 1
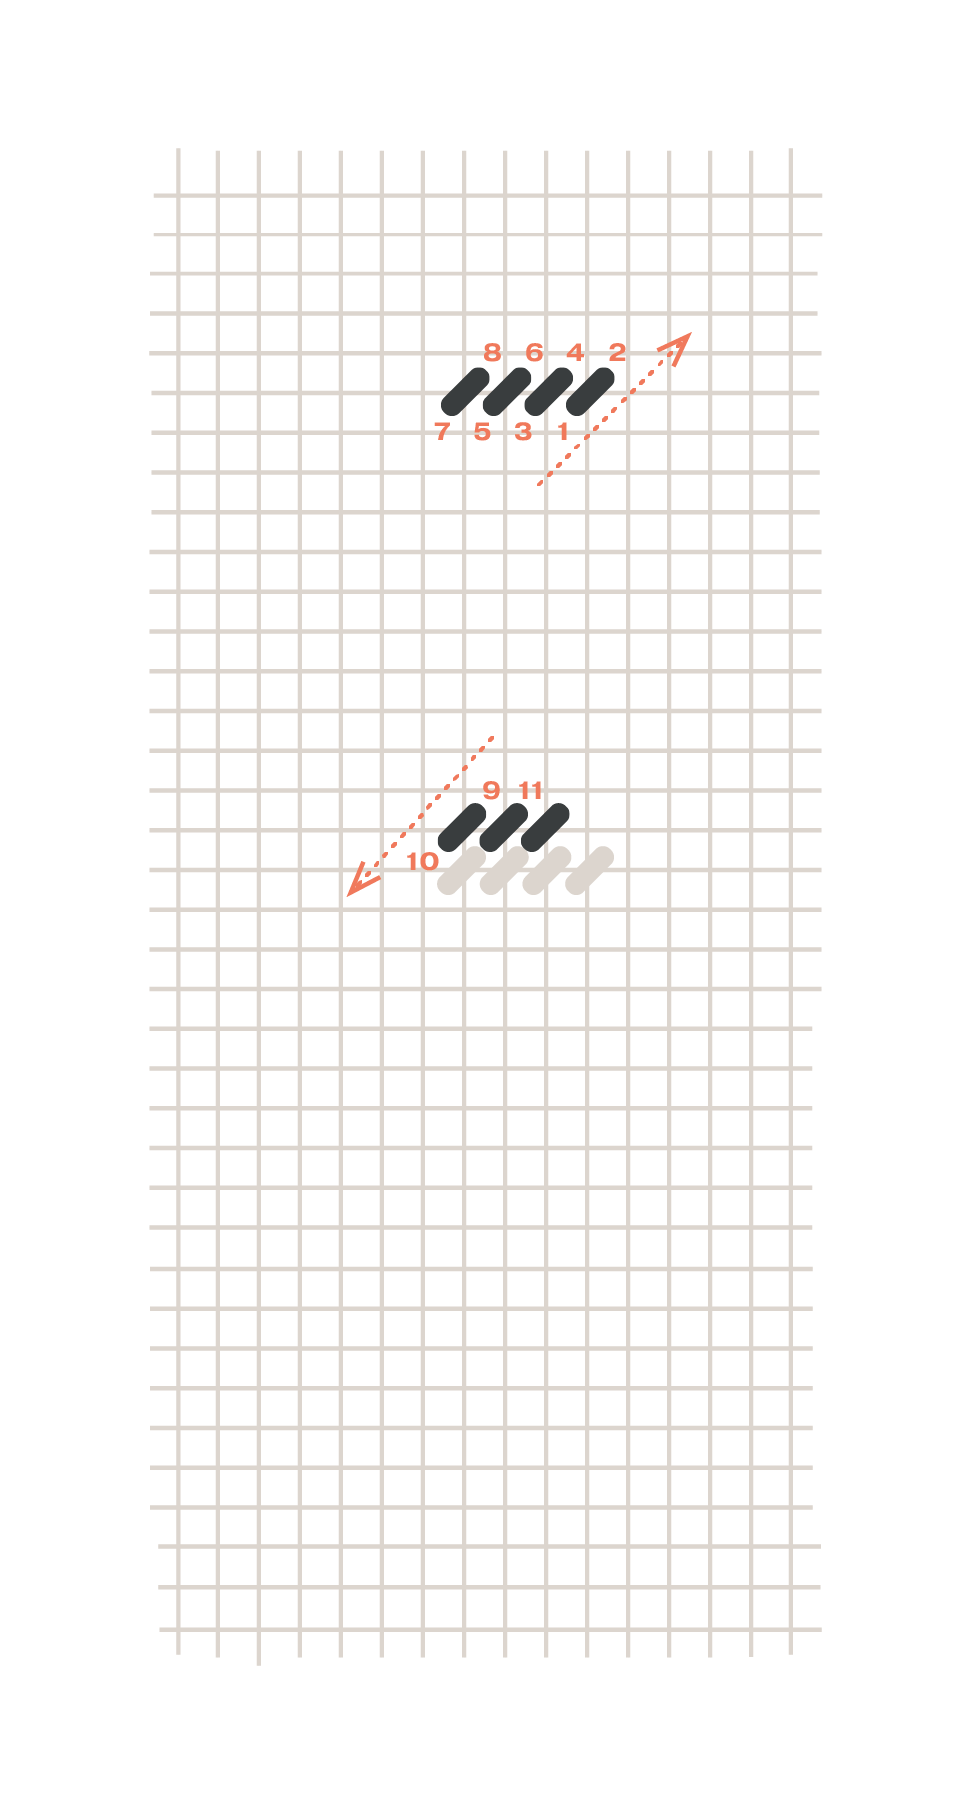
Continental is worked in horizontal rows and is reasonably hard wearing. It is best used for smaller areas as it can pull the canvas out of shape when used over large sections due to the multiple rows of right slanting stitches.

STEP BY STEP
- Working from right to left, come up in the bottom left (1) and cross diagonally over one intersection and go down into the canvas one row up and one column along to the right (2).
- For your second stitch, bring the needle up from the back of the canvas to the left of your first stitch (3) and take it down diagonally across the next intersection (4). Continue in this way until you complete your first row of stitches (5-8).
- For your second row return in the other direction - from left to right.
- In this direction, the order of the stitch is reversed and so this time you come up from the back of the canvas in the top right of your first stitch (9) and go down diagonally to the left across one intersection one row down and one column along (10).
The back of your canvas will be dense rows of diagonal stitches longer than the ones seen on the front.
This stitch can also be worked vertically if you prefer.
OTHER TENT STITCH TECHNIQUES
-

BASKETWEAVE
find out moreBasketweave is the most hard wearing version of Tent Stitch and should always be used for large areas as it’s less likely to warp the canvas. It is worked in diagonal rows either from the top right hand corner down or bottom left hand corner up.
-

HALF CROSS
find out moreThis is the final of the 3 Tent Stitch methods. Like Continental, Half cross is worked in horizontal rows but the back looks very different with small vertical stitches instead of dense rows of diagonal stitches. As a result, the main advantage of using Half Cross is that it uses less yarn and is therefore more economical.
YOU MIGHT ALSO LIKE...
-

DETACHED CHAIN
find out more -

CASHMERE DIAGONAL
find out more -

BYZANTINE
find out more
NEW IN
-
QUIET SHORES TAPESTRY NEEDLEPOINT KIT
Regular price £75.00 GBPRegular priceUnit price / per -
EVENING LIGHT TAPESTRY NEEDLEPOINT KIT
Regular price £75.00 GBPRegular priceUnit price / per -
MAGNOLIA BLOOMS TAPESTRY NEEDLEPOINT KIT
Regular price £75.00 GBPRegular priceUnit price / per


